**Introduction: Why Are Animal Crossing Hedges So Tricky?**
Hey, fellow Animal Crossing fans! If you’ve been spending hours designing your island, planting flowers, or building the perfect outdoor space, you probably noticed something: hedges. Yes, those cute little leafy fences that we all love. But, as with everything in Animal Crossing, even the simplest things can cause us a little trouble. Have you ever had an issue with hedges in the game? If you haven’t yet, then you might soon—because there are some tricks and problems with them that every player should know about. Let’s dive into this leafy dilemma!
**The Problem: What’s So Tricky About Hedges?**
Now, you might be thinking, “What’s the big deal with hedges? They’re just plants, right?” Well, while hedges in Animal Crossing seem simple at first glance, they can be more difficult than they look. Players have reported issues with planting them, placing them in the right spots, and even getting them to grow correctly. In some cases, players have complained that hedges don’t line up properly with other objects or paths on their islands. You know the frustration when your perfectly planned garden is ruined because your hedge won’t fit where you want it to? It’s enough to make you want to throw your Nintendo Switch out the window (but, please, don’t do that).
**The Platform: Where Does the Hedge Problem Show Up?**
Interestingly, the hedge issue tends to appear more frequently in *Animal Crossing: New Horizons* on the Nintendo Switch. Of course, the game is available on the Switch, so it’s where most players experience this problem. The issue is not something that happens across every platform, as other versions of Animal Crossing, like *New Leaf* or *Pocket Camp*, don’t really have the same complex hedge mechanics. But, in *New Horizons*, players often face a struggle with where to place these hedges, especially when trying to align them with fences, pathways, or other objects.
**The Background: What’s the Deal with Hedges in Animal Crossing?**
Hedges in *New Horizons* were introduced in the Summer update of 2020, and they quickly became one of the game’s cutest and most versatile decorations. They can be used to create fences, gardens, or even secret paths around your island. They are great for adding that extra touch of beauty to your island—if you can get them to behave!
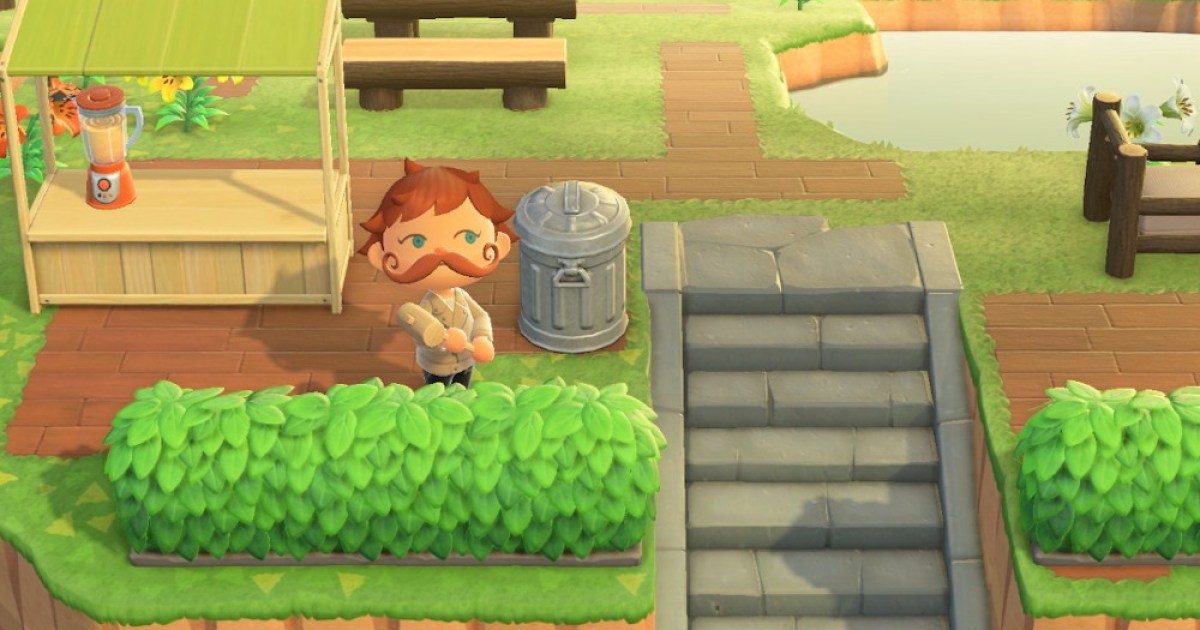
Here’s the thing: hedges grow in “sections,” which means they don’t always perfectly align with the surroundings. This has caused frustration for many players who simply want to create neat and tidy lines of greenery. And let’s not even talk about the alignment issue when trying to place them near buildings or structures! This problem has left players scratching their heads, wondering how to make them fit in without messing up their designs.
**The Experience: How Do Players Feel About Hedge Issues?**
Now, let’s be real for a second. How do we feel when we can’t get our hedges to line up the way we want them to? It’s a mix of confusion, frustration, and even disappointment. You spend so much time planning your island layout, but one little hedge misplacement can mess up your whole vision. Some players have gone as far as saying they “almost rage quit” because of the hedges not fitting where they want them to be. Yep, it’s that serious!
But there’s also a sense of triumph when you finally get them just right. Some players say that once they figured out the tricks and workarounds, they felt a huge sense of accomplishment. It’s all about patience, persistence, and a little bit of trial and error. If you can make it work, you’ll feel like a true island designing master!
**The Solution: How to Fix the Hedge Problem**
So, how can we fix the hedge problems in *New Horizons*? Well, here are a few tips to help you get those hedges in line:
1. **Use Custom Paths**: Sometimes the issue lies in the way hedges align with the ground. Using custom paths for better guidance can help create perfect rows and make placement easier.
2. **Place Them Carefully**: Hedges can’t always be placed exactly where you want them, but moving around objects or changing the direction you’re facing can help improve placement. Try rotating your character when placing hedges.
3. **Wait for Growth**: Hedges don’t grow immediately! If you’re trying to make a big hedge garden, be patient and wait for them to fully grow into their final shape. It might take a couple of days, but it’s worth it.
4. **Check for Updates**: Sometimes, glitches can mess with your hedges, so always make sure your game is up to date. Nintendo often releases patches that fix little issues like this one.
**Player Feedback: What’s the Community Saying About Hedges?**
What’s the word on the street? Well, *Animal Crossing* players on social media and gaming forums have a lot to say about hedges. Some players have shared their frustration with the alignment issue, while others have given tips and tricks to help solve the problem. Many players suggest using hedges to separate different areas of the island, like a garden space or secret area, but caution against trying to make perfect straight lines.
One popular tip from Reddit users is to use hedges as “guides” for other objects instead of trying to make them perfectly symmetrical. A lot of players have learned to embrace the natural, slightly imperfect look of the hedges, turning them into creative solutions for dividing up spaces.
**Conclusion: Have You Figured Out the Hedge Puzzle Yet?**
So, there you have it! Hedges are a cute and versatile feature in *Animal Crossing: New Horizons*, but they can also cause some headaches. Whether it’s the alignment issues or the growth process, hedges definitely have their quirks. But with a little patience, some trial and error, and the tips we’ve shared, you’ll be on your way to creating the island of your dreams!
Have you run into any issues with hedges? How did you manage to solve them? Share your experiences with us in the comments below—let’s help each other out!
**Summary**: In the end, hedges in *Animal Crossing* may not be as simple as they first appear, but they’re still a fun and rewarding challenge. Be patient, experiment with different strategies, and remember that the journey is just as important as the destination.


