When it comes to navigating the treacherous world of Baldur’s Gate 3 (BG3), few elements are as thrilling and impactful as the use of explosive barrels. These volatile items are not only a key part of combat strategy but also offer players opportunities to unleash devastating effects in battles. In this article, we’ll explore the role of explosive barrels in BG3, their strategic importance, and how players can make the most of them in the heat of combat.
Understanding Explosive Barrels in BG3
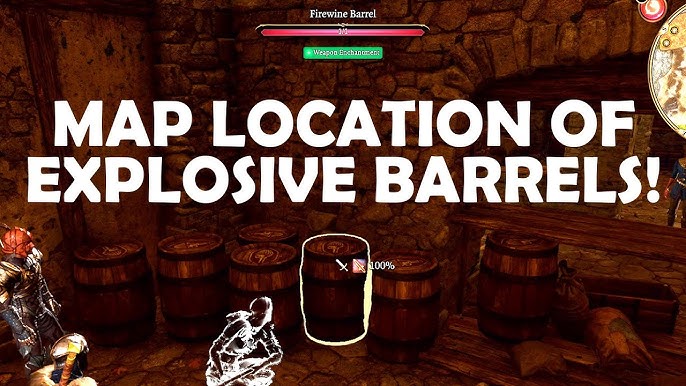
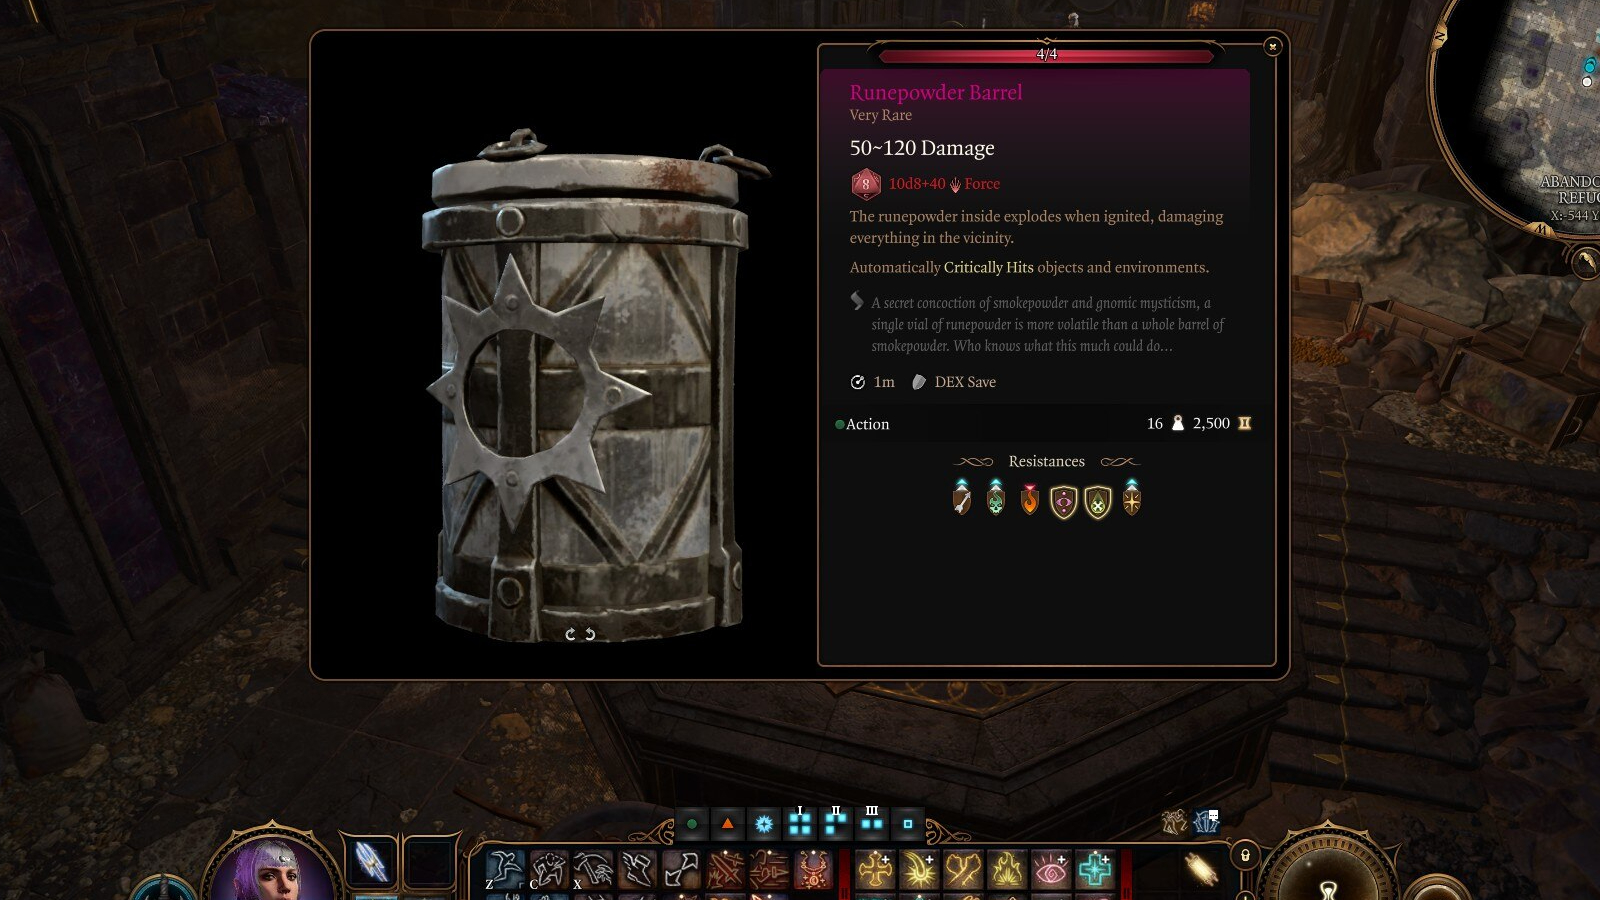
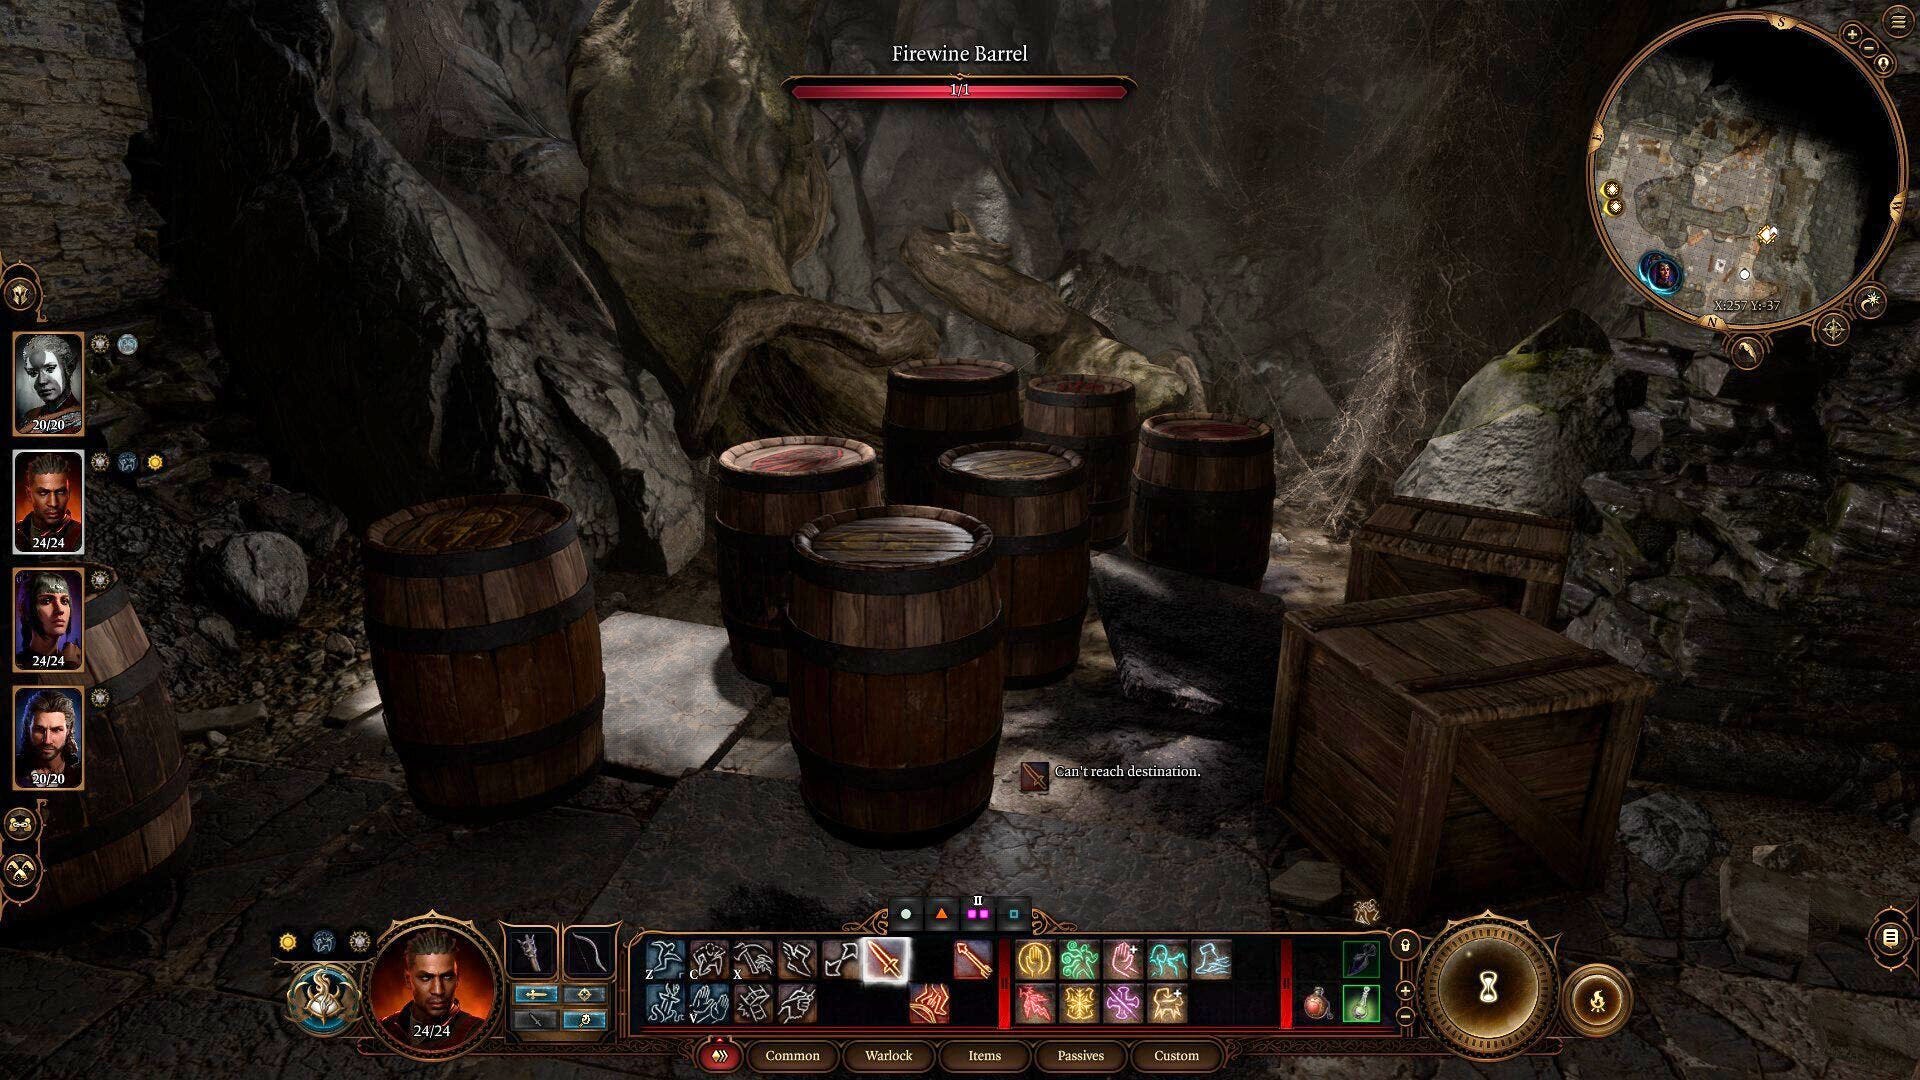
Explosive barrels in BG3 are an essential part of the environment, placed throughout various areas within the game. These barrels contain volatile substances that, when ignited or struck, create a massive explosion capable of causing significant damage to both enemies and the surrounding area. However, they are more than just destructive tools—they represent a powerful element of environmental interaction that players can use to their advantage.
Whether it’s an accidental spark from a fire spell or a carefully planned attack, explosive barrels add a layer of unpredictability to the battlefield. But to truly harness their potential, players need to understand how these barrels work and when to use them for maximum impact.
User Intent: Why Are Players Searching for “Explosive Barrels BG3”?
When players search for the keyword “explosive barrels BG3,” they’re likely looking for strategies to incorporate these explosive devices into their gameplay. The intent behind this search is to gain insights into how these barrels can be utilized effectively in combat scenarios—whether it’s for clearing a room of enemies, creating chaos on the battlefield, or solving environmental puzzles.

Additionally, players may be searching for ways to manipulate or control these barrels, especially in more challenging encounters where resource management and strategy are key to victory. With explosive barrels, a well-timed detonation can turn the tide of a fight, but a miscalculation could lead to disastrous results. Understanding the ins and outs of these explosive devices is crucial for anyone wanting to master the tactical aspects of BG3.
Strategic Use of Explosive Barrels in BG3
Explosive barrels can be game-changers if used correctly. Below are some of the key strategies players can employ to take full advantage of these fiery weapons.
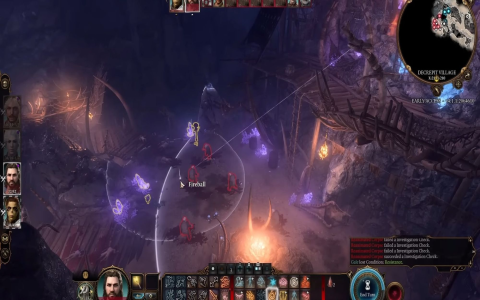
1. Environmental Awareness: In BG3, the environment plays a massive role in shaping combat outcomes. Explosive barrels are often placed near enemy groups or in areas where fire-based attacks are most effective. By positioning your party strategically and placing barrels in the path of enemies, you can create a devastating chain reaction that incapacitates multiple foes at once.
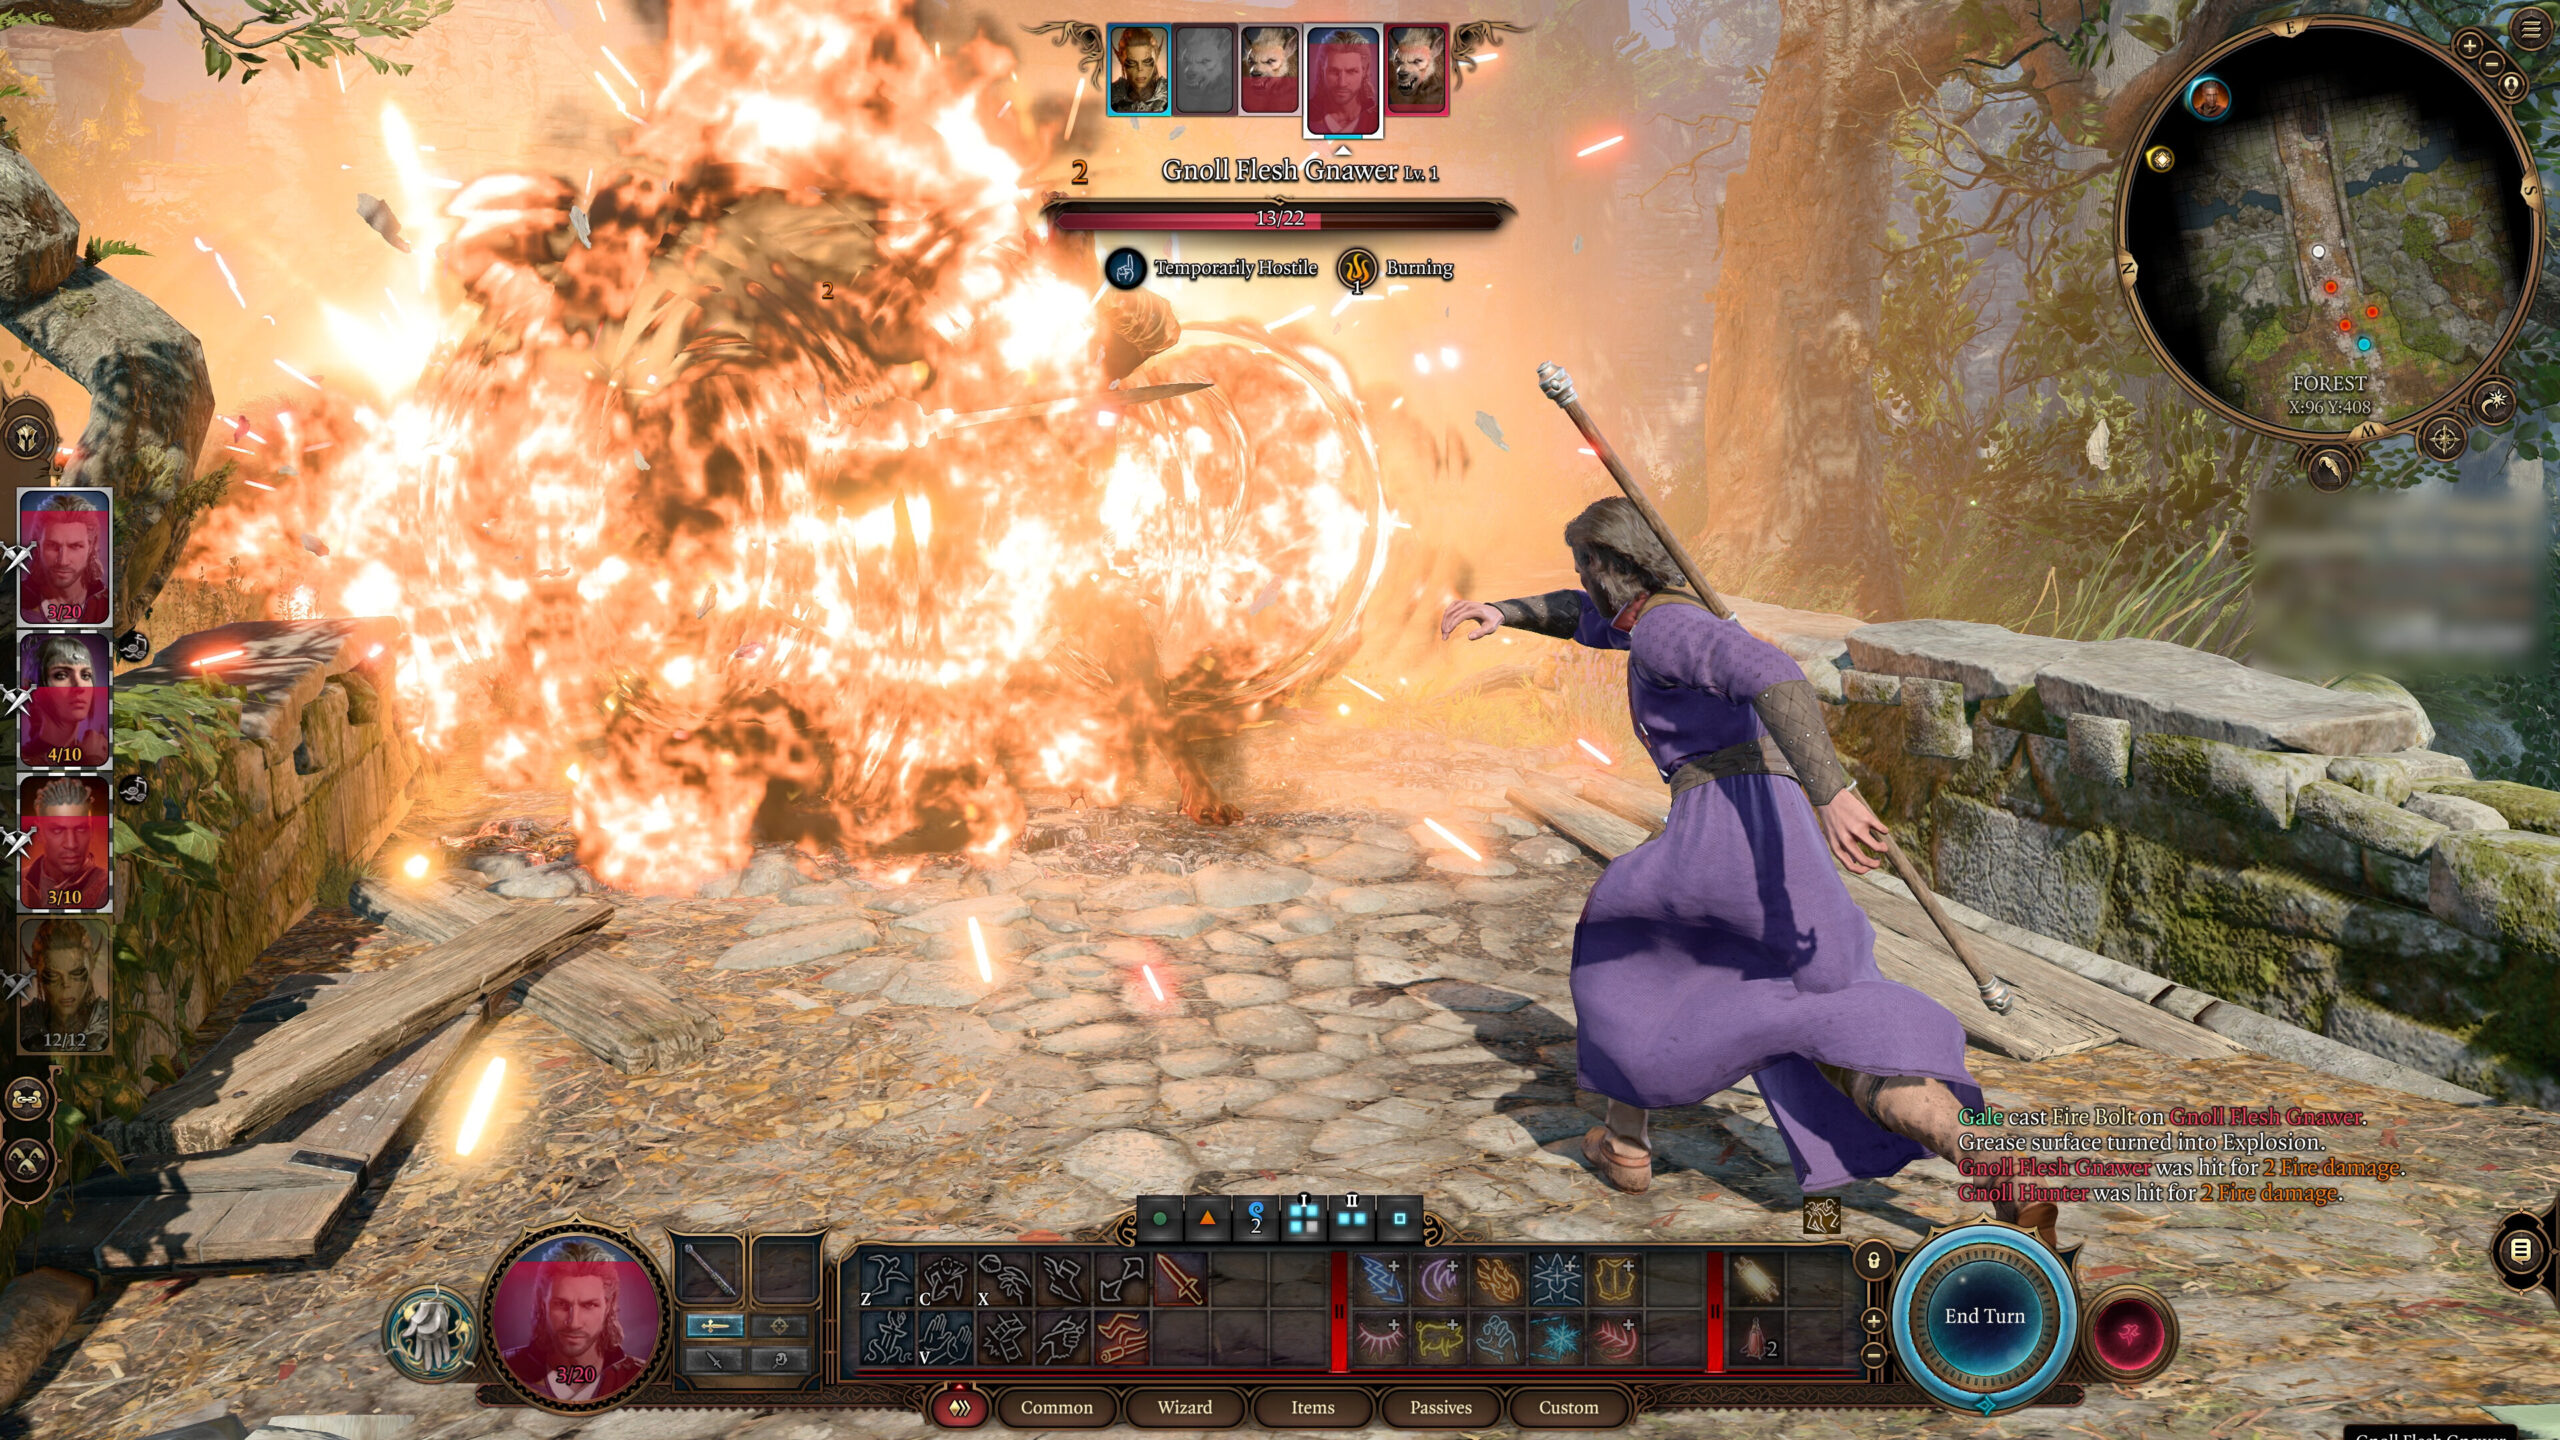
2. Triggering Explosions with Spells: One of the most common ways to set off explosive barrels is through the use of spells. Spells like Firebolt, Fireball, or Burning Hands can be used to ignite the barrels from a distance. When planning an ambush or preparing to take down a particularly tough group of enemies, these spells can turn the environment into your most powerful ally.
3. Manipulating Enemy Movements: Another key strategy is to bait enemies into areas with explosive barrels. This can be achieved by drawing their attention with a decoy or lure. Once the enemies are in range, setting off the barrels will cause massive damage and may even break up enemy formations, making them more vulnerable to follow-up attacks.
4. Combining with Other Elements: Explosive barrels can also be used in conjunction with other environmental elements to create more devastating effects. For example, players can combine explosive barrels with water or oil to create a larger area of effect, or use barrels near electrical sources to cause even more widespread damage.
5. Tactical Disruption: In addition to dealing damage, explosive barrels can be used to disrupt enemy strategies. For instance, blowing up barrels near enemy spellcasters or ranged units can force them to retreat or change positions, giving your team the upper hand. The sheer chaos of an explosion can also create confusion, potentially throwing enemies off balance.
Risk and Reward: The Double-Edged Sword of Explosive Barrels
While explosive barrels are incredibly potent, they are not without their risks. The most obvious danger is the potential for friendly fire—if a barrel explodes too close to your party members, it can result in significant damage or even a deadly defeat. Therefore, timing and positioning are critical when using these barrels.
Additionally, relying too heavily on explosive barrels can make players too dependent on one tactic, leaving them vulnerable when these barrels are unavailable or ineffective in certain scenarios. Successful players balance the use of explosive barrels with other strategies and approaches to ensure their victory.
Conclusion: Unleashing the Power of Explosive Barrels
In Baldur’s Gate 3, explosive barrels are much more than just a tool of destruction. They are a versatile and powerful environmental asset that, when used correctly, can drastically alter the course of a battle. Whether you’re using them to eliminate a horde of enemies, disrupt enemy formations, or solve a puzzle, explosive barrels provide players with a wealth of strategic opportunities.
However, as with any tool in BG3, they come with their own set of challenges. Players must be careful to avoid miscalculations that could turn their plans into catastrophic failures. Ultimately, mastering the use of explosive barrels is about understanding their potential and combining them with other combat strategies for the most explosive results.
By keeping these tactics in mind and exercising caution, players can make explosive barrels a key part of their tactical repertoire and gain the upper hand in even the most challenging situations. Whether you’re a novice or a seasoned veteran, explosive barrels are an exciting and essential aspect of combat in Baldur’s Gate 3—a tool that can unleash chaos and victory in equal measure.


