**Introduction: The Thrill of the Suicide Mission**
Ah, Mass Effect 2. One of the most famous space adventures ever made. But there is one mission that stands out above all others, and that is the Suicide Mission. It’s a test of your leadership, tactical skills, and decision-making. Not to mention, your ability to keep your crew alive. What’s that? You thought this was a fun trip through space? Well, welcome to the hard reality! The Suicide Mission is as deadly as it sounds, and the stakes are high. But don’t worry, we’re here to guide you through it using the *Mass Effect 2 Suicide Mission Flowchart*.
**The Challenge: Surviving the Suicide Mission**
In Mass Effect 2, the Suicide Mission is the final, and most important, part of the game. If you don’t make the right choices, well… your crew might not make it out alive. Imagine this: You’ve spent hours building relationships, completing missions, and leveling up. And then, in a single, poorly made choice, you can lose your favorite characters forever. The pressure is on.
There are many variables to consider—who you send on which task, who goes with you, and the choices you make during the mission. If you choose poorly, some characters might die. And let’s be honest, no one wants that. But don’t worry, we’ve got the *Mass Effect 2 Suicide Mission Flowchart* to help you make the right decisions and keep everyone alive. So, let’s break it down.
**The Flowchart: A Lifesaver or Overkill?**
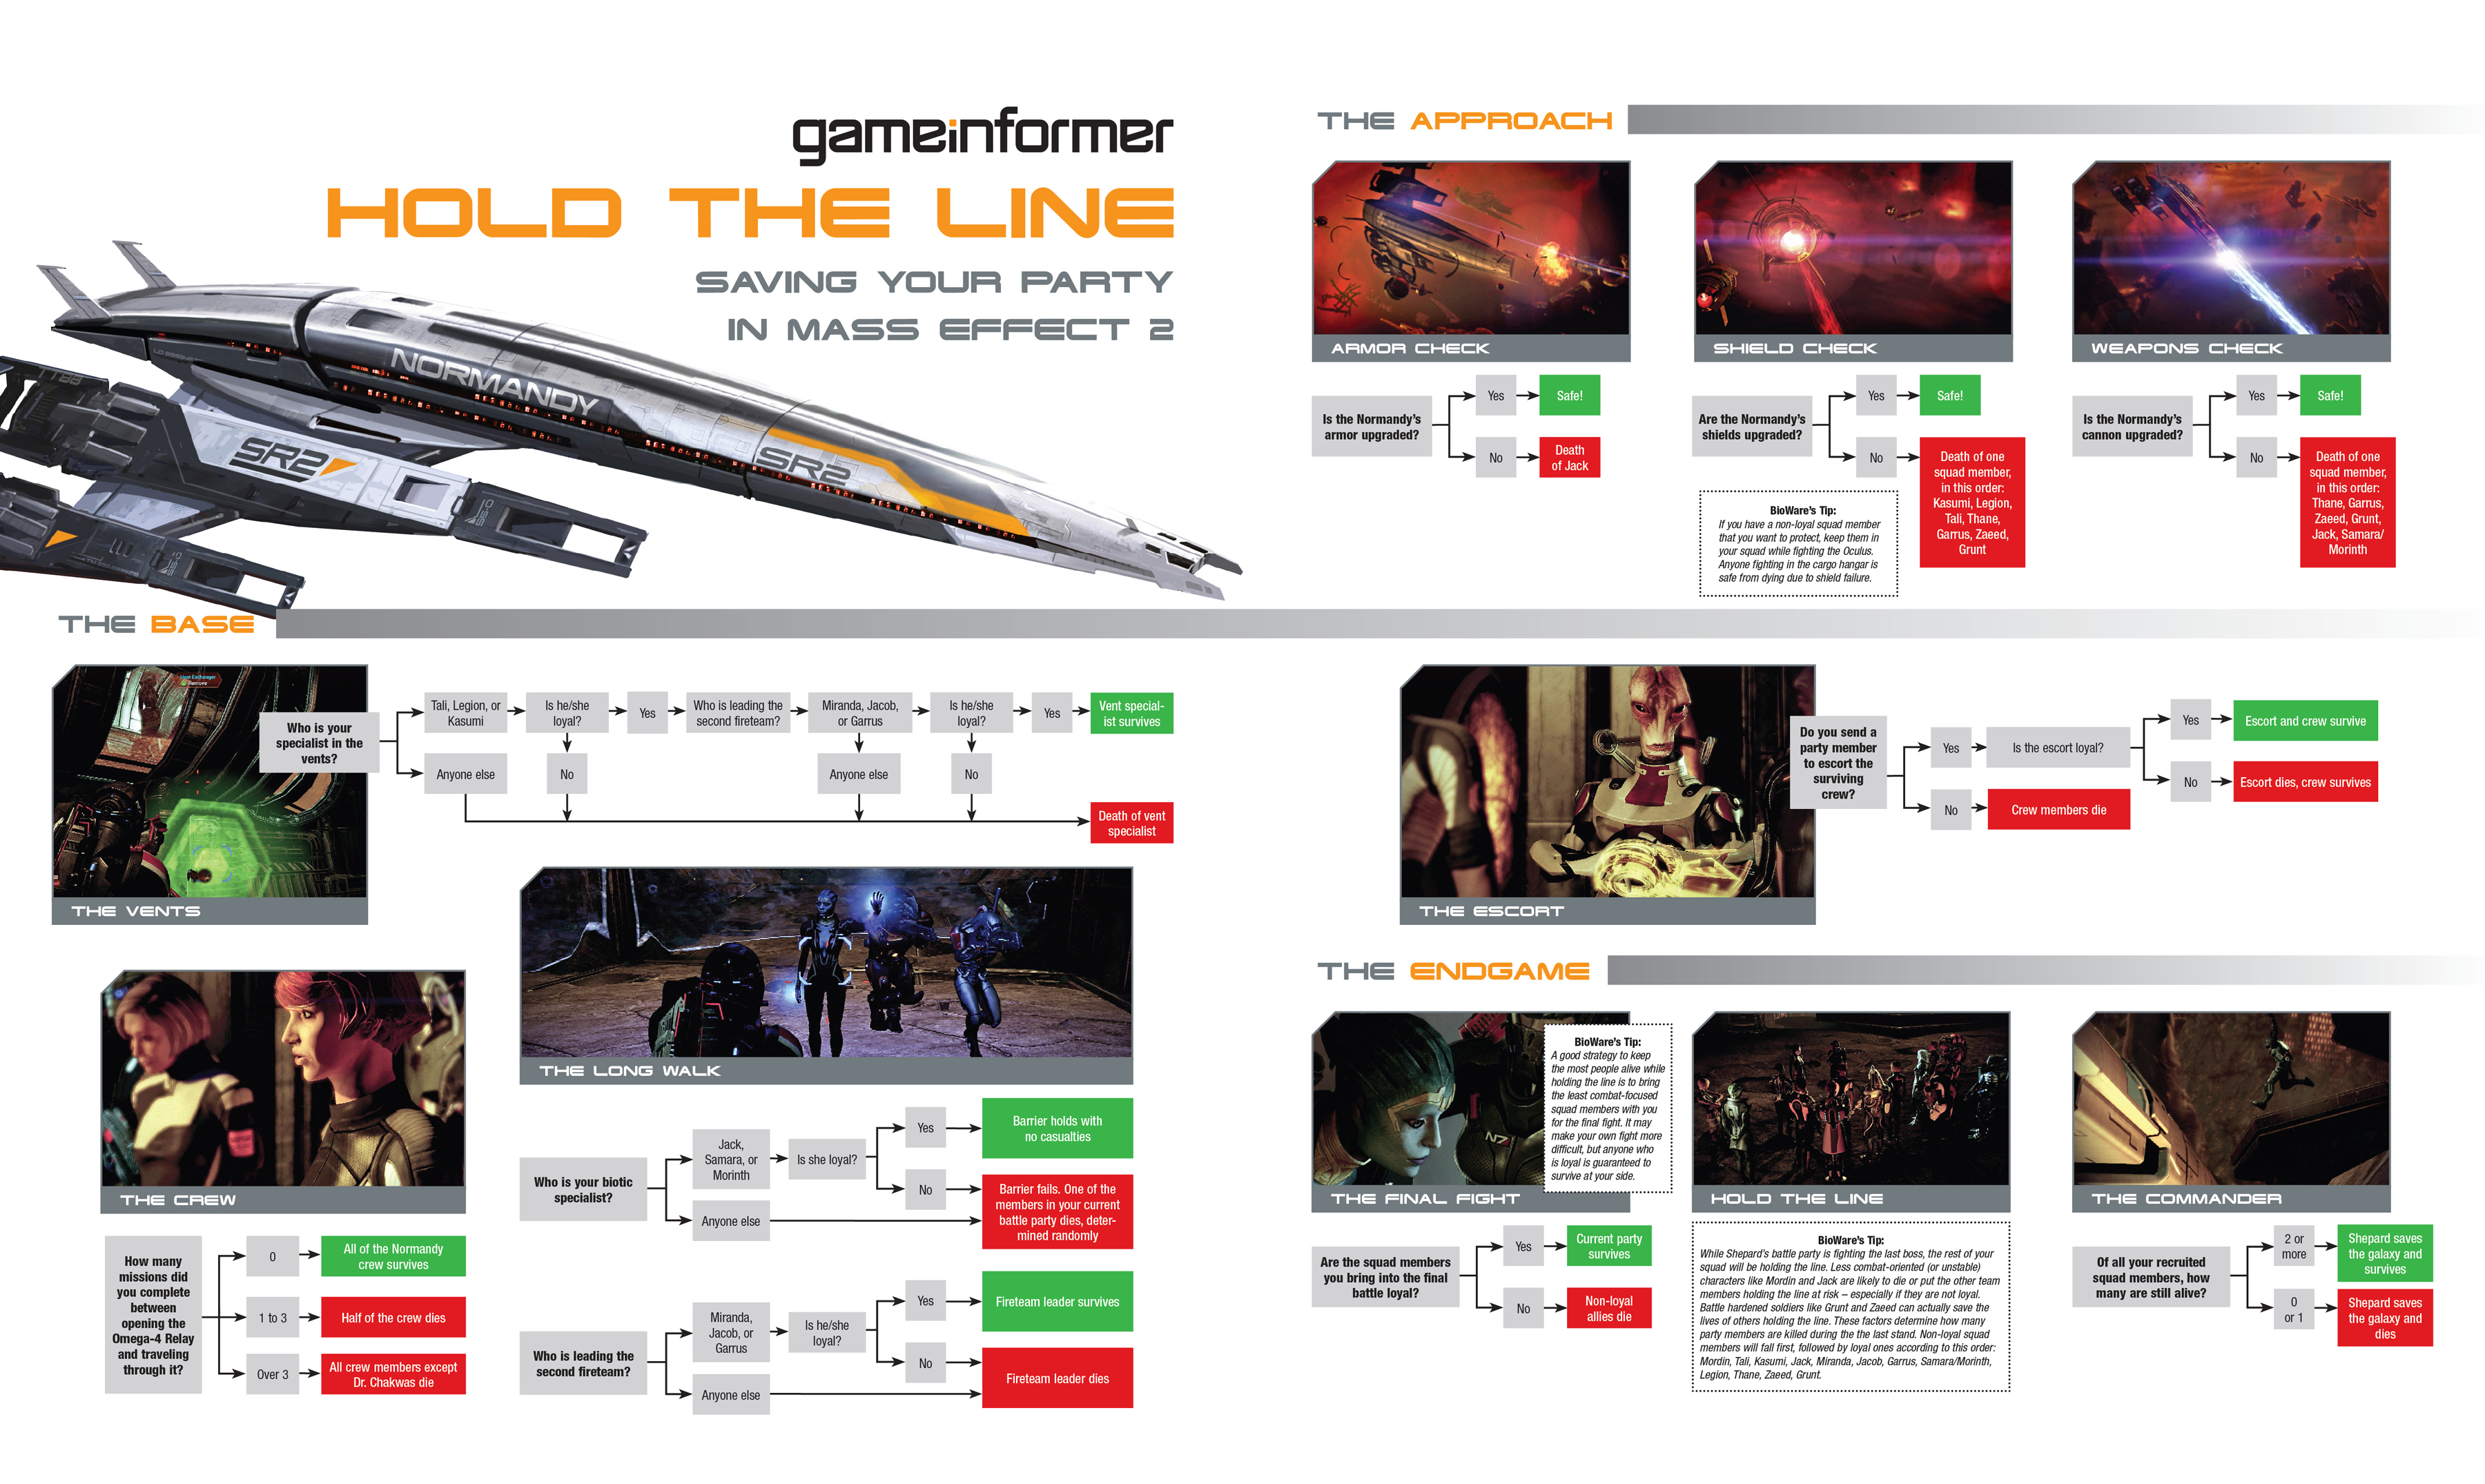
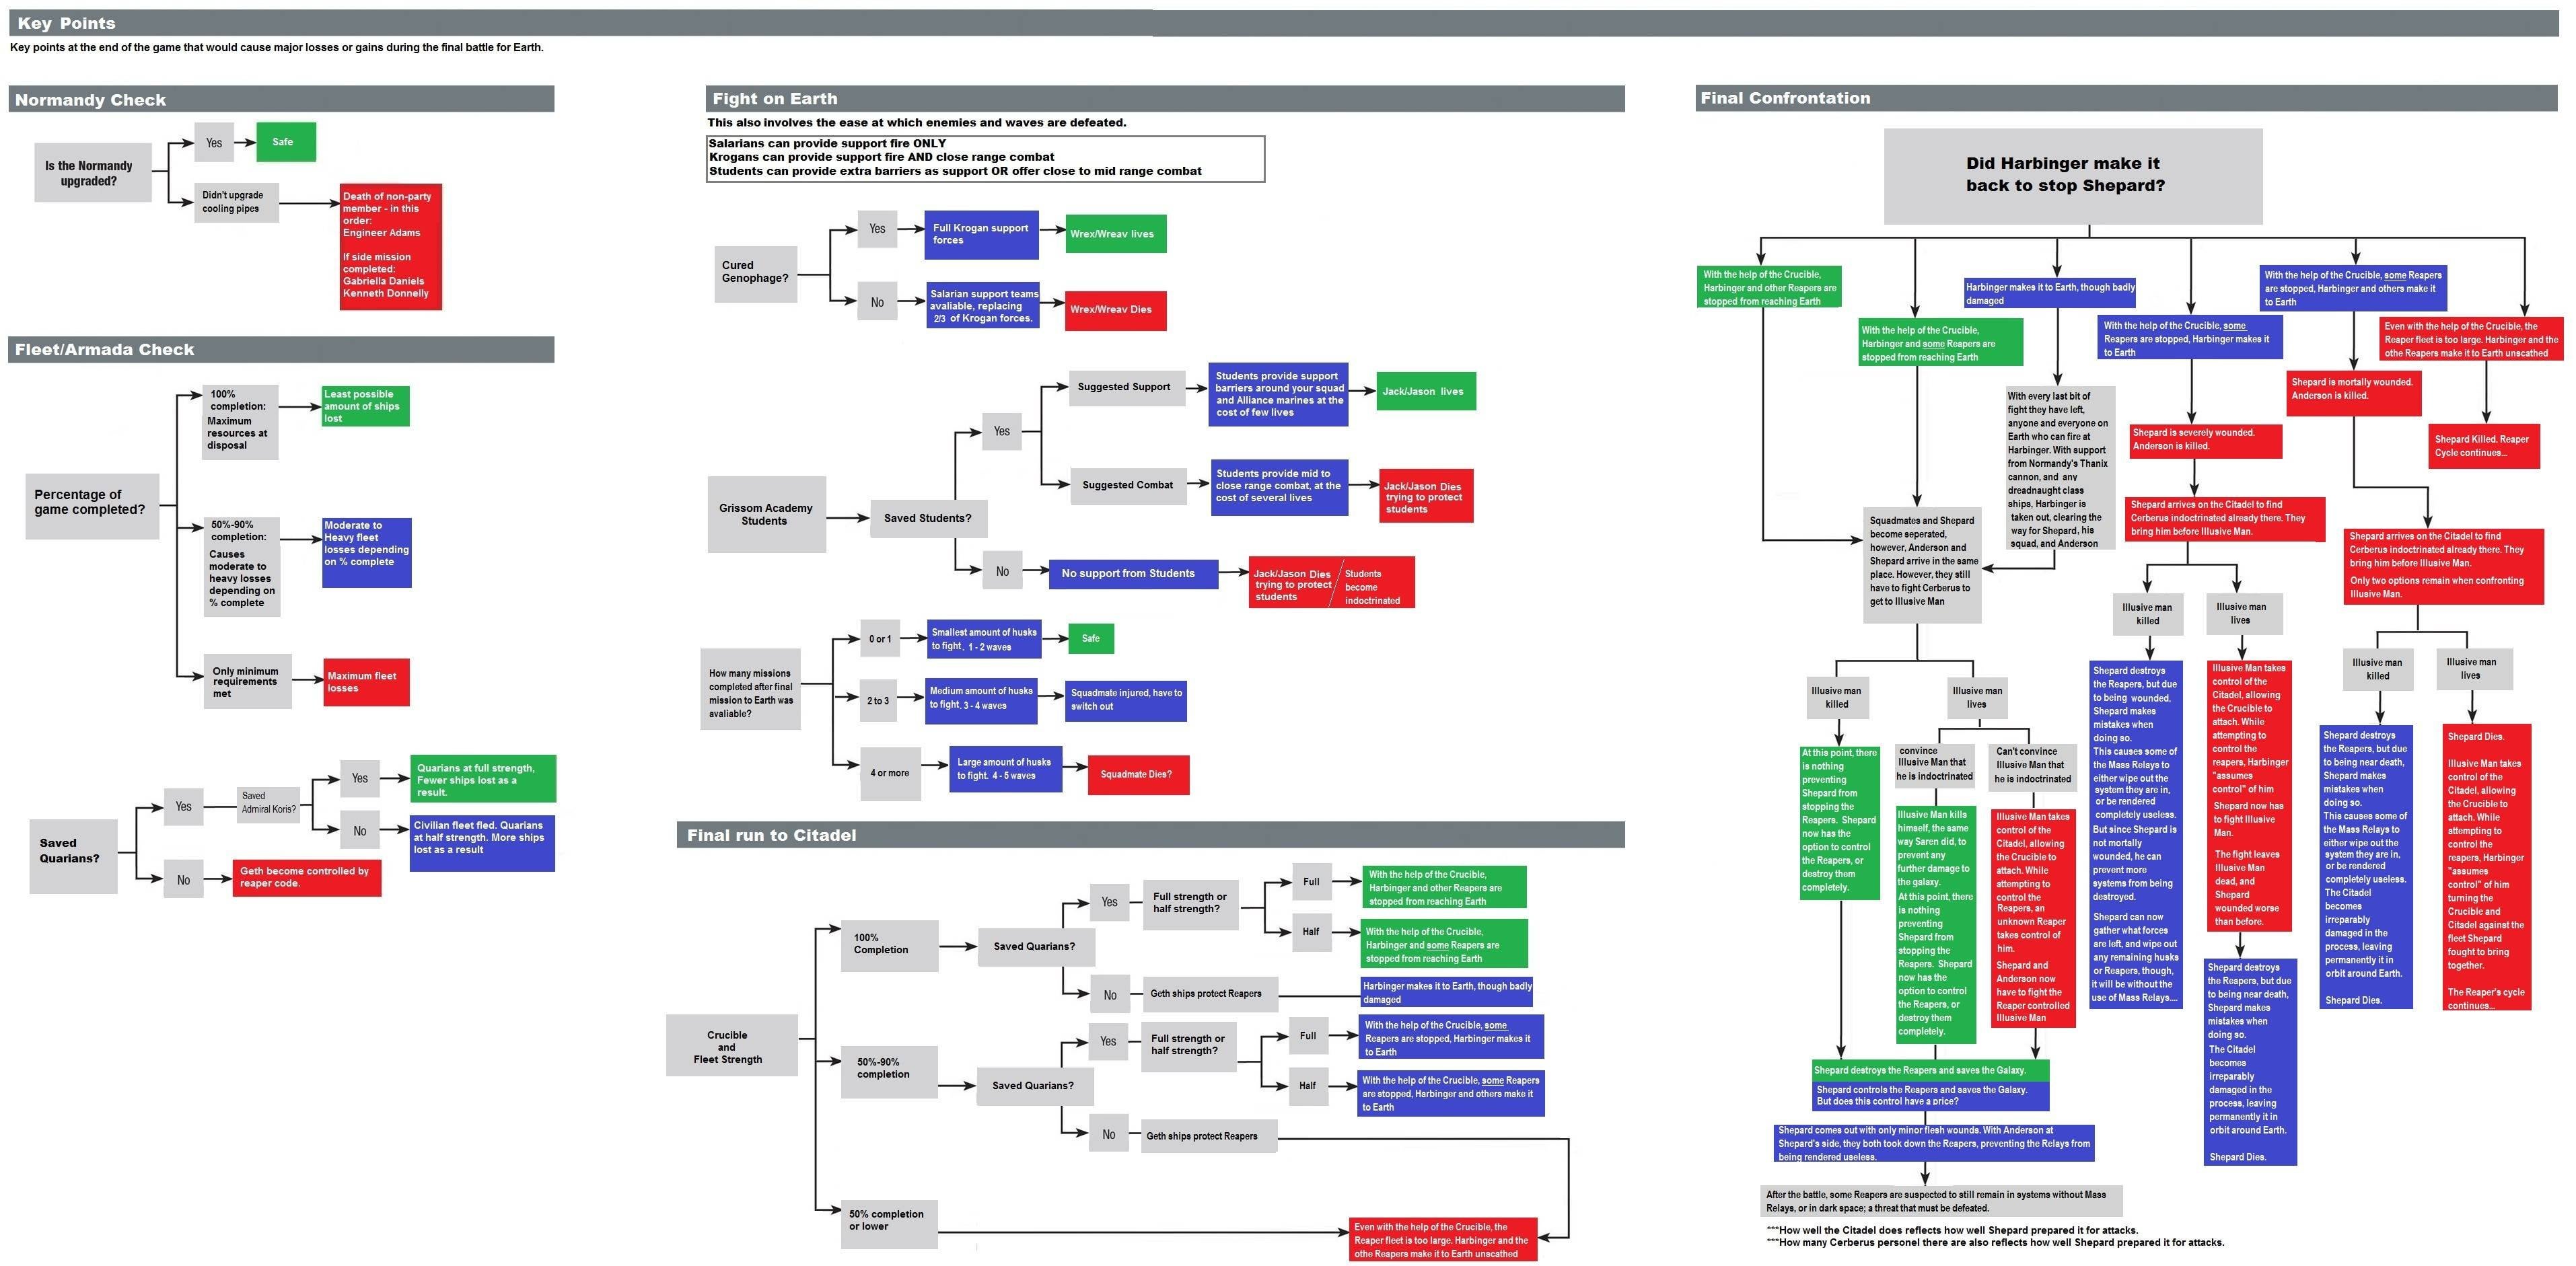
At first glance, the *Suicide Mission Flowchart* might look a bit overwhelming. But trust us, it’s your best friend. Think of it like a map for a dangerous jungle, except here the jungle is full of deadly decisions, and the map is your guide to survival.
Here’s the basic flow: The mission has multiple stages, and at each stage, you have to choose who goes where. Do you send your best engineer to fix the ship’s engines, or do you let your most loyal soldier handle the defenses? The consequences are real, and the right choices will lead to everyone’s survival, while the wrong ones… well, not so much.
The flowchart divides these choices into categories:
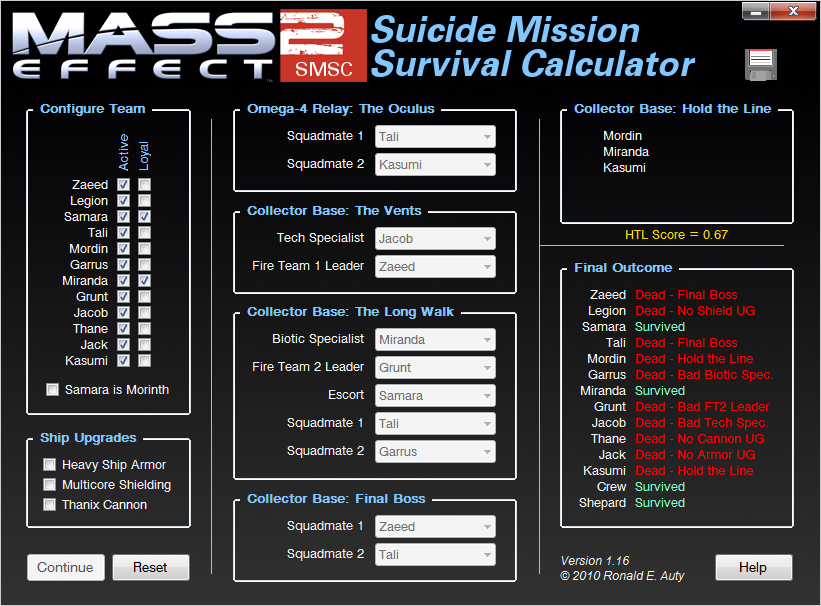
1. **The Preparation Stage:** Choosing your team. Some characters are better suited for certain tasks than others. Pick wisely, and think about each person’s skills.
2. **The Mission Choices:** You’ll need to make decisions on the fly. Who stays with the Normandy, and who goes with Shepard to the final fight?
3. **The Final Battle:** This is where the flowchart really becomes essential. Make sure you know what you’re doing, or your crew will not make it.
**Player Experience: The Tension Builds**
Let’s talk about some player experiences. Many fans have shared their stories of heartbreak when a favorite character dies during the Suicide Mission. The first time we played, we were terrified. We carefully followed the flowchart, making sure we had the right people in the right places. But there’s always that nagging fear—what if we messed up? What if the flowchart didn’t work this time?
The tension is real! The first time we lost a squad member, it felt like a personal failure. After all, we’ve spent hours getting to know these characters, and we wanted to make sure everyone made it out alive. The emotional connection is strong, and when things go wrong, it can sting.
**How to Ensure Success: Follow the Flowchart, but Know Your Team**
Okay, so here’s the real deal: The flowchart is helpful, but you still need to understand the characters. It’s not just about following the chart blindly. For example, if you send Tali to fix the engine, and you haven’t built up enough trust with her, she might fail, and your mission could end in disaster. So, make sure you’re not just checking boxes, but you’re also paying attention to your team’s relationship with Shepard.
Here’s a simple breakdown of what works:
– **Tali and Legion:** These two are great choices for technical tasks. Make sure you’ve built a strong relationship with them before sending them on important jobs.
– **Garrus and Miranda:** They’re the backbone of your team. When in doubt, send them for critical roles like holding the line or defending the ship.
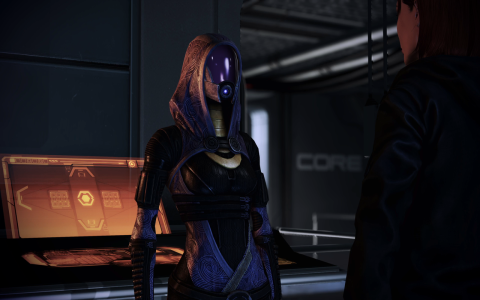
– **Jack and Mordin:** These two bring the heat. They’re perfect for offensive roles, so make sure they’re on your side when the action ramps up.
**Community Feedback: What Are Other Players Saying?**
The *Suicide Mission* is one of the most discussed topics in the Mass Effect community. Everywhere you look, you’ll find players sharing their personal success (and failure) stories. Some players argue that the flowchart is essential for success, while others think it takes away from the drama of making decisions on your own.
One user on a forum said, “I followed the flowchart to the letter, and guess what? Everyone survived! But the second time, I went rogue, and half of my team didn’t make it. It was devastating.” Others mentioned they enjoyed the challenge of failing and retrying, as it gave them a sense of accomplishment when they finally got it right.
So, what’s the general consensus? The flowchart is definitely a useful tool, but it’s up to each player how they want to experience the mission.
**Conclusion: Do You Trust the Flowchart?**
The *Mass Effect 2 Suicide Mission Flowchart* is your guide to survival, but it’s also part of the fun. It helps you make critical decisions, but it’s still all about your connection with your crew. Take the time to understand your team, and make choices that reflect your relationships with them.
Have you ever made a terrible choice during the Suicide Mission? Or maybe you followed the flowchart to perfection and saved the day? Either way, we want to hear from you. Share your thoughts, experiences, and any helpful tips in the comments below. Let’s keep this conversation going!
**Final Thoughts: Stay Smart, Stay Alive**
To wrap it up: The Suicide Mission in Mass Effect 2 is a rollercoaster of emotions, and the flowchart is a useful tool to guide you through it. Use it wisely, but also trust your instincts. Keep your crew safe, and remember, every decision counts. May your mission be a success!


