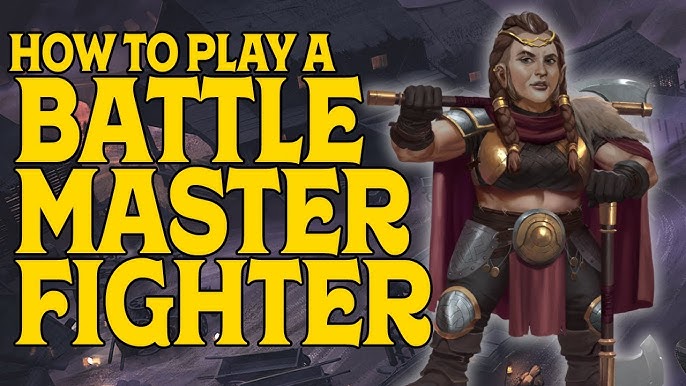
In the vast world of Dungeons & Dragons (D&D), the Battlemaster Fighter archetype stands out as one of the most versatile and strategic classes. Among the many abilities that make this subclass unique, the “trip” maneuver is a key tool that often leaves both players and Dungeon Masters thinking about its true potential. If you’re looking to learn about the Battlemaster Fighter trip range, this guide will explore the topic in depth, offering insight into how it works, its synergy with other abilities, and its tactical applications.
What is the Battlemaster Fighter’s Trip Maneuver?
To start, it’s important to define the Trip Attack maneuver, which is one of the combat maneuvers available to the Battlemaster Fighter. This maneuver allows a Fighter to use a superiority die to attempt to knock an enemy prone after hitting them with a weapon attack. The immediate result of a successful Trip Attack is that the target falls to the ground, potentially making them more vulnerable to other attacks.
However, one critical question often arises: What is the range of a Trip Attack for a Battlemaster Fighter? The answer lies in understanding the mechanics behind this ability.
Trip Range: How Does It Work?
The Trip Attack is fundamentally a melee maneuver. This means that its “range” is tied to the reach of the weapon you’re using. For example, if you’re wielding a sword, the trip maneuver will be limited to your sword’s melee range (usually within 5 feet of your target). On the other hand, if you’re wielding a polearm with reach (like a glaive or spear), the Trip Attack can extend up to 10 feet from you, thanks to the weapon’s extended reach.
It’s crucial to recognize that the Trip Attack doesn’t inherently increase the range of your weapon—it’s just a tactical choice that can be applied within the weapon’s normal reach. This gives you the flexibility to control the battlefield in close quarters or from a slightly extended distance, particularly if you’re facing multiple enemies.
How to Maximize the Effectiveness of Trip Range
Understanding the range limitations of the Trip Attack is only the beginning. To truly maximize its effectiveness, it’s important to consider the tactical positioning and synergy with other abilities. Here are some strategies to make the most of your Battlemaster Fighter’s trip range:
1. Synergy with Polearms
If you wield a polearm with reach, your Trip Attack can affect enemies from a safe distance. A well-timed Trip Attack can knock an enemy prone before they get close enough to retaliate, offering an advantage for your allies to strike with advantage. If you’re playing as a Battlemaster Fighter, the extra reach can be a game-changer in many scenarios, especially against enemies with less mobility.

2. Combining with the Knock-Prone Advantage
When an enemy is knocked prone, melee attackers have advantage on attack rolls against them. This makes the Trip Attack particularly effective when paired with other abilities that exploit this disadvantage, such as attacks from a rogue or other players who can deal high damage while the target is prone.
3. Disrupting Enemy Tactics
The ability to knock an enemy prone can dramatically change the dynamics of a fight. A Battlemaster Fighter with this maneuver can disrupt enemy spellcasters, ranged attackers, or any opponent relying on movement to position themselves. For example, knocking an enemy prone near a cliff or an obstacle can prevent them from easily standing up or escaping.
4. Optimizing Superiority Dice
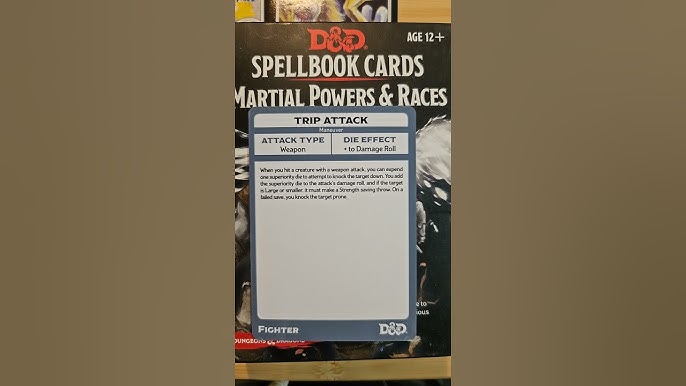
The Trip Attack uses superiority dice, which increase in size as you gain higher levels in the Battlemaster Fighter subclass. These dice are essential not only for adding to the damage but also for triggering certain effects like disarming or tripping. As you level up, this can significantly improve your chances of success with the Trip Attack, making it even more reliable as a combat option.
Tactical Scenarios for Using Trip Range
To give you a clearer picture of how the Trip Attack fits into various tactical scenarios, let’s imagine a few situations:
1. Facing a Swarm of Enemies
You’re surrounded by multiple enemies, and your allies are positioned behind you. Using your polearm’s Trip Attack at the right moment can knock one or more of them prone, creating a temporary shield for your backline and buying time for your teammates to either reposition or strike.
2. Battling a Ranged Attacker
Imagine an enemy archer or spellcaster is causing havoc from a distance. By closing the gap and using the Trip Attack, you can force them to the ground, preventing them from taking advantage of their distance and mobility. This is especially potent when you combine it with the Battlemaster Fighter’s Commander’s Strike or other tactical maneuvers.
3. Strategic Movement and Control
The Battlemaster Fighter’s ability to control the battlefield is enhanced by the Trip Attack. Whether you’re trying to stop a fast-moving enemy or break up a formation, the range provided by a reach weapon allows you to influence enemy positioning from a distance, adding a layer of depth to your battlefield control.
Conclusion

The Battlemaster Fighter trip range is not just about the mechanical distance of a weapon’s reach but also about the strategic depth it offers. By combining weapon reach, the knock-prone advantage, and well-timed superiority dice usage, a Battlemaster Fighter can become a master of battlefield control. The Trip Attack is a versatile and potent tool that allows you to manipulate the positioning of enemies and protect your allies, making it an indispensable part of any Battlemaster’s arsenal.
Whether you’re playing in a tightly-knit dungeon crawl or a large-scale battle, understanding the full potential of your Trip Attack is key to mastering the Battlemaster Fighter subclass and ensuring that your enemies fall flat at the perfect moment.


