In *Baldur’s Gate 3*, the “Wall of Thorns” is a powerful spell that can be a game-changer in both exploration and combat. It encapsulates the essence of strategic gameplay in *BG3*, where positioning and environmental manipulation often dictate the flow of battle. If you’re diving into the world of Faerûn, understanding the Wall of Thorns is crucial for mastering the art of tactical combat and ensuring your party’s success in tricky situations.
What is the Wall of Thorns?
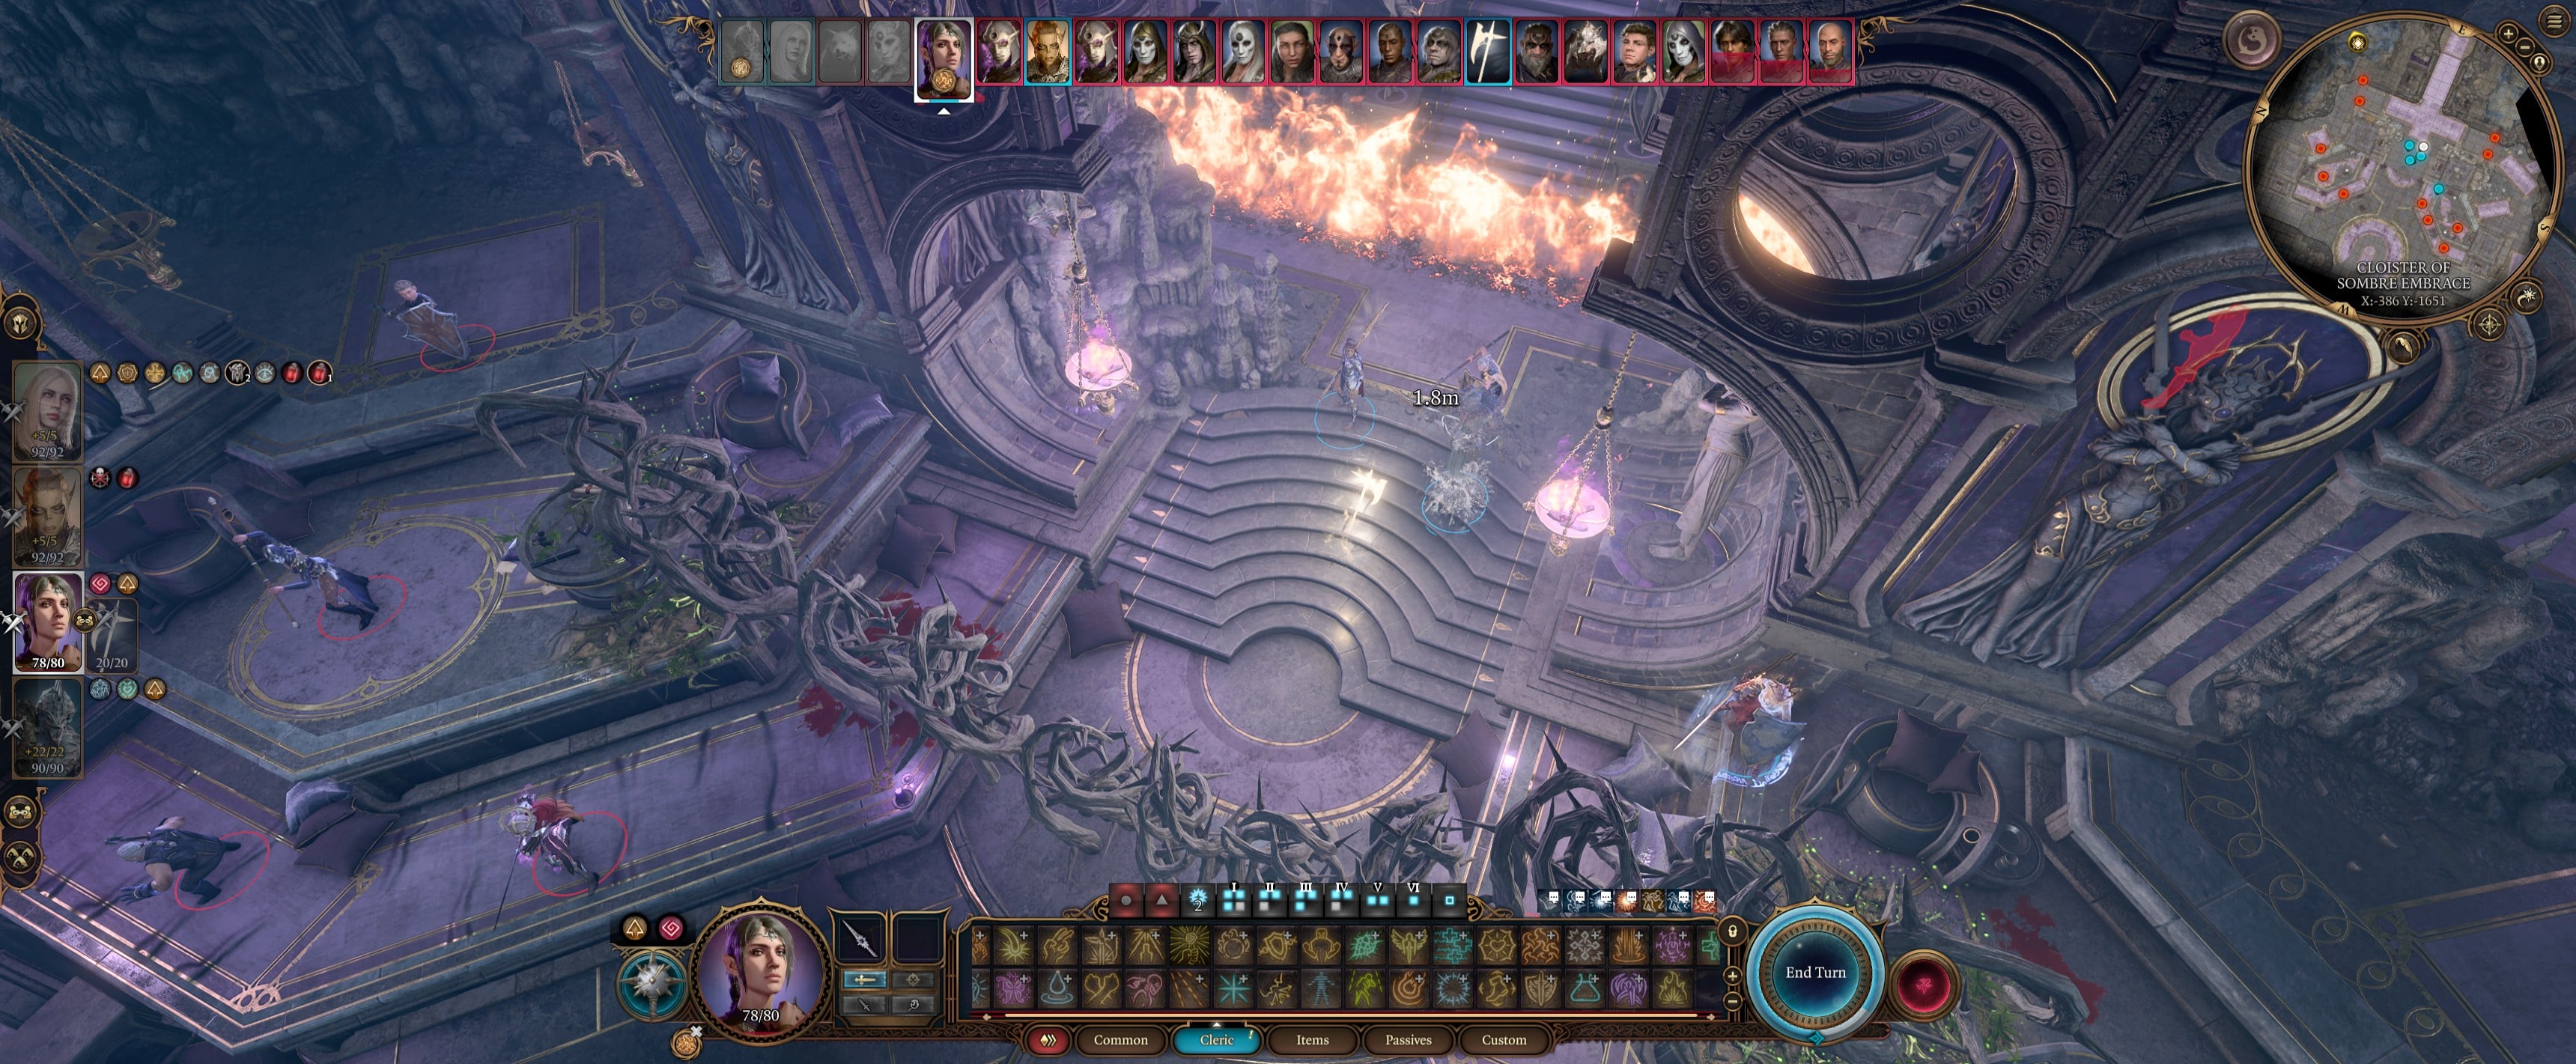
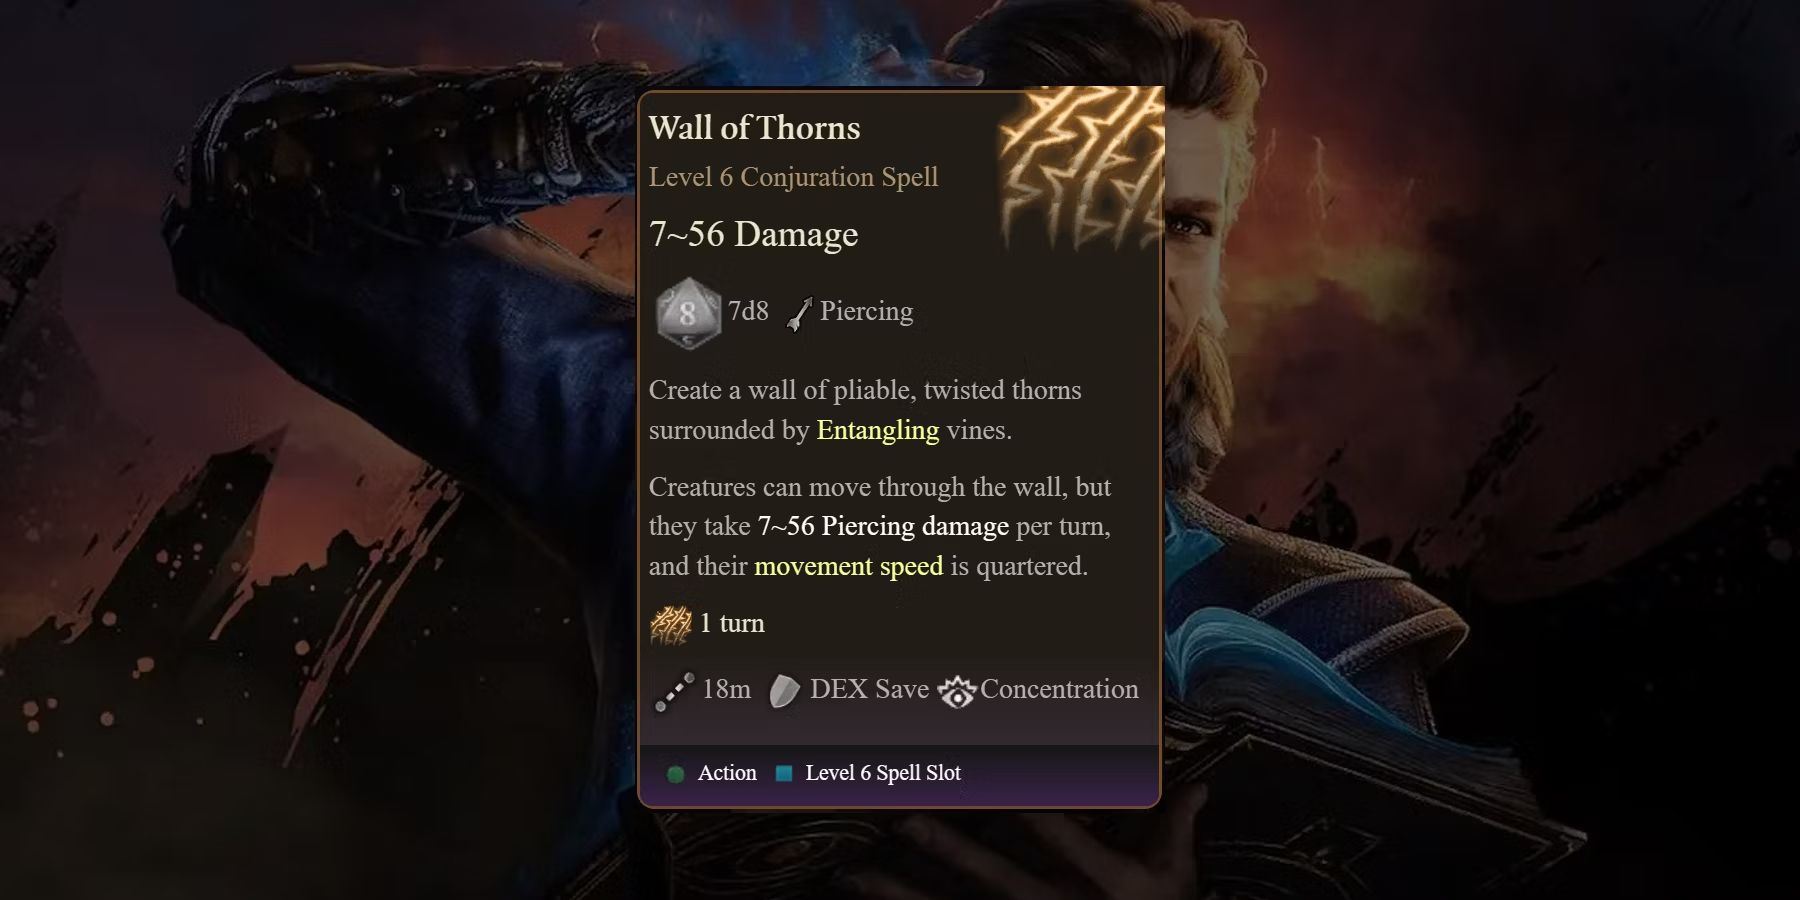
The Wall of Thorns is a 4th-level druid spell in *Baldur’s Gate 3* that creates a dense barrier of sharp, thorny vines in a designated area. The wall can stretch up to 12 meters long and 3 meters high, blocking enemies and causing damage to anyone who attempts to cross it. The thorny barrier can also provide strategic advantages, especially in tight situations or when you need to control the battlefield. It’s a spell that offers both offensive and defensive utility, as it hampers enemy movement while also dealing significant damage over time.
Strategic Applications in Combat
In the heat of battle, the Wall of Thorns offers a multitude of tactical opportunities. One of the most effective uses is to create choke points—places where enemies are forced to confront your party head-on. By casting the wall between your enemies and your party, you can funnel them into positions that are easier to control. This is especially useful when dealing with large groups of enemies, as it limits their ability to maneuver and can split them into manageable clusters.
Furthermore, the damage dealt by the Wall of Thorns isn’t trivial. Enemies attempting to move through or over the wall take piercing damage, which can wear down even the toughest foes. This is especially valuable in encounters with enemies that rely on brute force or high health pools, as the wall chips away at their strength while they attempt to break through.
A Defense Like No Other
While the offensive aspects of Wall of Thorns are readily apparent, its defensive properties are equally significant. A well-placed Wall of Thorns can provide a safe haven for your more fragile characters, like spellcasters or ranged attackers, keeping them out of harm’s way while your tankier characters engage enemies head-on. Additionally, if you find yourself at a disadvantage, you can use the wall to block escape routes for enemies, preventing them from retreating and forcing them to fight or perish.
Interactions with Environment
Another interesting aspect of the Wall of Thorns is how it interacts with the environment. The spell can sometimes have unexpected results based on the terrain or weather conditions around you. For example, if cast near water, the thorns might entwine with the surrounding flora, making it harder for enemies to move around. In certain cases, the wall can even be used creatively to trigger environmental effects, such as blocking off a dangerous path or pushing enemies toward other hazardous zones on the map.
How to Maximize the Effectiveness of Wall of Thorns
To get the most out of Wall of Thorns, timing and positioning are key. It’s important to cast the spell in areas where it can block vital paths or control the movement of your enemies. Consider the layout of the battlefield and think about how your enemies might attempt to move. A well-timed Wall of Thorns can be the difference between victory and defeat.
Also, keep in mind that Wall of Thorns is not an indefinite solution. The spell has a duration, and once it expires, the battlefield will return to normal. As such, using the spell in combination with other spells or abilities—such as crowd control or area-of-effect damage—can help ensure your enemies remain locked down long enough for you to capitalize on the advantage.
Conclusion: A Key Tool in Your Tactical Arsenal
In conclusion, the Wall of Thorns in *Baldur’s Gate 3* is not just a defensive spell—it’s an essential tool for any player looking to master the intricacies of battlefield control. Whether you’re blocking off enemies, protecting your allies, or setting traps for your foes, this spell offers a versatile and dynamic solution to many combat challenges. The next time you find yourself facing a horde of enemies or needing to block an escape route, remember that the Wall of Thorns might just be the key to securing your victory.
By understanding its potential and incorporating it into your strategies, you’ll be one step closer to becoming a master tactician in the world of *Baldur’s Gate 3*.


